The Times Tables Video (2 to 6)

Wednesday 06 September 2017 at 7:16 pm

My daughter was told to learn her times tables over the summer holidays, and I wanted to come up with a way of helping her remember, and a project for both of us to get involved in.  As I have access to a live blues band, I thought a song would be the ideal thing, and we then made this silly video together...

Click to view fullscreen

DIY Motorcycle Panniers

Saturday 24 June 2017 at 9:47 pm

I wanted a little extra carrying capacity on my bike (a Yamaha TDM850) so have been looking at panniers.  I hate the look of topboxes as they spoil the look of a bike, and I wanted a small, light set of cases that didn't add width to the bike.  All the options to buy are too big, too heavy, too expensive, and really difficult to find - it is after all a 21-year old bike.  So the DIY option was the only way.

Cases
These needed to be small, fairly narrow, and light.  I originally looked at army surplus ammunition boxes, but they're metal and heavy.  I stumbled upon these Plano field boxes in an eBay search which suited the project perfectly. Plano Mouldings.  They're about the same size as an A4 piece of paper. Not massive capacity, but just the job for me.  Waterproof seal, lockable (with a padlock), with carrying handles.  Lovely.

Racks
Now to mount them on the bike.  Other similar projects use welded frames out of tube or box section, but my welding isn't up to much, and these cases are light enough not to need it.  So the project was made with 2mm strip steel, threaded bar, flush mirror mounts and a load of nuts and shakeproof washers.

I made drop brackets at front and rear - front: used a longer undertray bolt to add an L-bracket; rear: metal strip sandwiched between chassis and subframe, picking up the existing bolt to secure.  Threaded bar across, protected from the elements with some heatshrink tubing.  

The frame has a top bar, onto which the mount plates are riveted, and a diagonal strut which picks up the exhaust/footrest hanger.  The cases have the corresponding mount plates riveted on with another strip of steel for strength, plus a through bolt attaching to the diagonal by a wingnut so the whole lot doesn't fall off.  After a few weeks of testing in the field I've replaced the rivets with proper screws & Nyloc nuts, and given the boxes a coat of silver paint with black accents for that fake Touratech look (and fake sticker) - see last pic.

pannier 1006 pannier 1004 pannier 1007 pannier 1008 pannier 1016 pannier 1003 pannier 1009 pannier 1010 panniers

Wacom Intuous Tablet Driver SCCM deployment

Friday 24 February 2017 at 3:11 pm

UPDATE - As from version 6.4 there are official install switches, listed in this article: https://developer-support.wacom.com/hc/en-us/articles/9354508643479-Installer-Command-Line-Parameters

I've been using /s for silent, and /opt OperatingModeEnterprise which gets rid of all the startup stuff.

I was tasked with installing drivers for Wacom Intuous graphics tablet to multiple rooms/computers which has always been a manual job.  Today I found it can be done via SCCM or other deployment tool.  The driver I used was the Universal Driver 6.3.17-3, although they all look pretty similar.  Steps were as follows:

  • Use 7zip to extract the installation files from the downloaded .exe
  • Use the silent switches (discovered by accident/guesswork) to run on your favourite deployment system
  • SETUP.EXE -SILENT -NORESTART
  • Detection method for SCCM (I'm sure there are loads, but this was the first one I found, and it works, so why look further?)
  • Registry HKLM\SOFTWARE\Microsoft\CurrentVersion\Uninstall\Wacom Tablet Driver\DisplayVersion = 6.3.17-3

That's it.

Wacom Intuos Windows 10 Tap & Hold Right Click Disable

Friday 20 May 2016 at 1:51 pm

Just got a Wacom Intuos Pro tablet thingummy for Photoshop shenanigans, and was constantly annoyed by the Windows feature whereby you tap and hold to create a right-click, a little animated circle appears followed by the context-sensitive right-click menu.  All fine and dandy unless you're doing precision Photoshop things, when it's too sensitive.  Every time I tried to do anything, the spinny circle kept popping up, to my eternal annoyance.

Some Googling pointed to disabling a setting in Pen and Touch (Control Panel > Hardware & Sound > Tablet PC Settings > Other tab > Go to Pen and Touch).  There you can disable the Press and Hold Right click feature.

In my case, however, the Wacom driver had hijacked these control panels and wouldn't let me access them.  The solution was to stop the Wacom Professional Service (Start, type services.msc, find the entry for Wacom, right-click, stop the service), change the options as above, then restart the service.

I'm in a domain environment, so it remains to be seen how much of this sticks after logoff, but at least I can now muck about on Photoshop without constantly saying 'Grrrr'.

Windows Cannot Connect to Printer Error 0x00000057

Thursday 12 May 2016 at 3:43 pm

When adding a network printer to a Windows PC (in our case Samsung X7600s by Group Policy), sometimes the printer doesn't appear, and when attempting a manual install you get Operation Failed with Error 0x00000057.

There are a lot of forum posts about this, many of which talk about mucking around with security permissions, copying folders from known good machines and that sort of shenanigans.  None of this worked for me, so here's my solution.  It's not actually a solution to the underlying problem, but it is a reasonable workround for the symptoms.

On the offending PC, go to Devices & Printers and go through the Add New Printer process to add a local printer.  It doesn't matter about ports because you're going to delete it straight away.  Use the 'Have Disk' option and point to the correct driver.  If you're asked about driver versions, choose to Replace the Current Driver.

Once the install has finished, delete the printer entry you've just created, then try adding the network machine again.  Boom.

img 20160511 153121 img 20160511 153650 img 20160511 153708 img 20160511 153732 img 20160511 153752

Home made DJI Phantom 4 sun shade

Thursday 17 March 2016 at 2:44 pm

My friend and aerial photographer Mark (YouTube - TheMarkyShow) bought the latest DJI Phantom 4 quadcopter, and it's an amazing thing.  He wanted to get the official DJI sun shade but wanted to get flying right from day one, so I made one out of card for him:

Template

sunshade template

Cut out of mount board with a sharp scalpel, duct tape to strengthen the folds, and a couple of Velcro ties stapled on to hold it together.  This one fits the iPhone 6+, will probably fit smaller phones, but you may have to vary the location of the cutout for cable connection.  If I did it again I might make the side flaps a bit longer, but it seems to work pretty well.

marks-sunshade marks-sunshade1 marks-sunshade2 marks-sunshade3 ipadshade1 ipadshade2 ipadshade3

*Disclaimer!  I can't guarantee this will work for your controller/phone, it was a custom make for one specific.  Template is not necessarily to scale, your mileage may vary. You don't have to go home but you can't stay here.  Trousers may go down as well as up.  Your home is at risk if you douse it in petrol and chuck a match in the kitchen window.

*EDIT:  He's only gone and got himself an iPad Mini to run the 'copter, so it was out with the scalpel for another one.  Almost exactly the same, just a bit bigger.  Cardboard, duct tape, velcro.

Song Lyrics to ePub format

Thursday 09 October 2014 at 6:40 pm

As lead singer in my band Hot Cold Ground I'm hopeless at learning lyrics, so I always have a music stand with a big book of printed lyrics (and sometimes chords, but this IS a blues band, so not often!), which is just another bit of gear to carry around and set up.

I'm a long-time ebook reader, starting off reading on old Palm Pilot and Clié devices, before moving to cheap Chinese Android tablets, and recenly ending up with a Barnes & Noble Nook Simple Touch with Glowlight.  This last device is perfect, with an endless battery life and backlight for night-time use.

So with a second Nook purchased the next stage is to see if I can convert my lyrics document to use on the reader.  It does support .pdf but doesn't quite have the functionality I needed, like a contents list and one page-per-song.  Here's how I did it.

The ideal source format to convert is HTML, and I use the excellent and free Calibre to do the conversion (more on that later).  To create the source I used Dreamweaver, but there are loads of free HTML editors available.  I did try using Word's 'Save As HTML-Filtered' but it adds a truckload of extra crap.

The key here is to avoid most of the tags that normally get generated.  I'm not going to go into detail on HTML coding, again there are plenty of tutorials out there.  All you really need is the <h1> tag and the <br/> line break tag.  Avoid the <p> paragraph tag - it just causes confusion.  If you're typing in your content then use Shift+Enter for line breaks rather than Enter on its own. You'll probably need to manually edit your code to add the tags to titles.  I haven't explained this very well so here's an example:

<!DOCTYPE html PUBLIC "-//W3C//DTD XHTML 1.0 Transitional//EN" "http://www.w3.org/TR/xhtml1/DTD/xhtml1-transitional.dtd">
<html xmlns="http://www.w3.org/1999/xhtml">
<head>
<meta http-equiv="Content-Type" content="text/html; charset=utf-8" />
<title>Hot Cold Ground setlist Oct 14</title>
</head>

<body>
<h1>Song One Title</h1>
La la la verse 1 line 1<br />
La la la lyrics line 2<br /><br />
La la la verse 2 line 1<br />
La la la lyrics line 2<br/>
<h1>Song Two Title</h1>
etc etc
</body>
</html> 

The top bit (up to </head>) is auto-generated by Dreamweaver, then the important bit is enclosed between <body> and </body> tags.  Song titles (which the ePub will treat as chapters) need to have <h1> and </h1> either side of them, and each line of the song has <br/> (a self-escaping line break) at the end.  Add a second one if you want a gap between verses.

Depending on how you've put the lines in (I did it by copy & paste from Publisher, which initially didn't work - I had to paste into Notepad first then copy again) you may end up with those silly paragraph <p> tags.  You can leave them in if you want but it will indent first lines and waste space, so best to strip them out. 

Still with me?  Good.  Now save that document and get Calibre installed.  I'm not going to go through how to use the program, you can pick that up for yourself.  But basically, you import the .htm file you've just made into Calibre, then run its conversion routine to convert it to ePub.  The key part here is the Structure Detection, the first box dictates what Calibre will look for to make chapters, and it'll be your <h1> tags.  You can use the wizard here, but basically it needs to say //h:h1.  In the Table Of Contents section check the first box to force use of auto-generated Table Of Contents.  Apart from adding a picture if you want, you're good to go.  Stick the resulting converted file onto your eReader and that's it.  It works nicely for me, with most songs on a single page (text size dependent, of course), and when you swipe or press each song starts on a fresh page.

Next is attaching the Nook to my mic stand.  I've bodged something but it's not a permanent solution, so will probably end up buying a proper tablet holder.

VGA over Cat5

Friday 30 May 2014 at 12:49 pm

Regular listeners will know I like using Cat5 cable (of which I have an inexhaustible supply of scrap lengths), so having successfully used it for audio, I thought I'd look at video too.

It's for a work project - we have a number of digital signage screens running on the excellent Xibo open-source system.  4 of our screens run off one client PC using a splitter/transmitter system from Mauve, left behind from the original installation, but these rely on a single Cat5 run between transmitter and receiver.  Other client displays use an old re-purposed laptop running Windows 7 ThinPC (a cut-down version of W7), which can be hidden in a suspended ceiling above the displays.

For the new installation we have no suspended ceiling, and no way of running Cat5 back to the transmitter, so it needs another old laptop, but there's nowhere to hide it.  There's a network point near the screen, connected back to a switch cabinet.  So, I thought, if I can put the laptop in the cabinet, and run VGA over the ethernet cable, then job's a good'un.

So I did a bit of Googling and found this on Instructables.  Could it possibly work?  Well, the answer is YES!

Got an old VGA male-male cable and cut it in half, then had to use a multimeter to work out which pins are connected to which wires.  (Caution - cheap thin VGA cables are somehow different, and combine some of the connections, so make sure it's a nice thick one).  The diagram on Instructables is viewed from the rear so is back to front, so watch that, too.  On mine the wires were as follows and connected to the Cat5 thus:

VGA
Pin
VGA
cable
Cat5
cable
Pin1 Red+ Solid Green
Pin2 Green+  Solid Orange
Pin3  Blue+  Solid Blue
Pin4  NC  -
Pin5  Black  Blue/White (with Pin8)
Pin6  Red Screen  Green/White
Pin7  Green Screen  Orange/White
Pin8  Blue Screen  Blue/White (with Pin5)
Pin9  NC  -
Pin10  NC  -
Pin11  Brown (not used)  -
Pin12  NC  -
Pin13  Orange  Brown/White
Pin14  White  Solid Brown
Pin15  NC  -

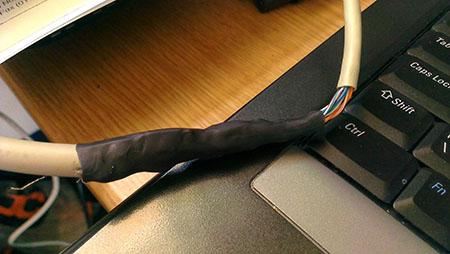
Spliced together (sorry, I sealed before photographing) with plenty of heatshrink it looks like this:


Make 2 of these!

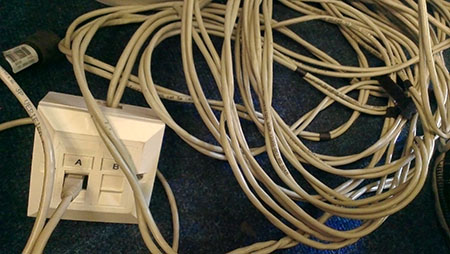
Then I tested using another bodge job - a 20m extension cable with a pair of cat5 cables and boxes we use for emergency networking.

And bugger me, it only works!  1024x768 is what we'll be using, but it did 1280x1024 fine too.  There's a little bit of ghosting, but for text on a screen, it's perfect.

I'll update when it's actually in situ and working across what will be Cat6, in fact.