Thursday 08 December 2011 at 2:23 pm
A colleague has bought their partner an iPad for xmas, along with a Wacom Bamboo stylus. I loved the stylus, and wanted one for my smartphone, but didn’t want to pay for it. A bit of Googling revealed some home-made versions, with an old pen and some damp sponge, but they felt a bit ‘bodgy’. So I thought I’d have a go.
The base for my device is an old tyre pressure gauge I got free with a bike magazine years ago. It has to be a metal case as the capacitive screen responds to tiny electrical charges from your sweaty fingers. The nib also needs to be conductive. I found a bit of conductive foam in the memory-slot hatch of a broken laptop, but you see these little pads everywhere (well, if you dismantle electronic things often enough you do).
The pressure gauge. Photo taken after I’d butchered the top bit!
The foam pad from an old laptop. It sat between the chassis and the inside of the memory access flap. I think it earths the door. Well, it did until I ripped it out.
Chop off the top and hoick all this gubbins out
Tuck the foam pad into the bottom of the spring and shove it back in. The sticky-out bits make a nice interference fit, plus the remains of the pressure-gauge end make a plug that holds it all together.
This is now the business end. It needs to be about ½cm square to mimic the tip of your finger, but it works surprisingly well! I might add a old bolt or similar bit of metal into the tube for a bit of extra weight and the ‘real pen’ feel.
The finished stylus in action! Free painting app for Android –
Sketchbook Mobile Express. Next, find a clip and a nice top bit to finish it off!
Nice end plug and protective lid from an old felt-tip pen. I’ve also glued in a cut-up allen key for extra weight. It also now has a pocket clip (not pictured!)
Friday 04 November 2011 at 11:49 am
Thursday 06 October 2011 at 11:37 am
Sunday 17 July 2011 at 10:37 pm
Done some testing in a ‘real’ environment now, and it’s a qualified success. It handles the FX send and return plus the channel control without a problem, even over 10m of cat5. However the disappointment is that as soon as I add the input from the guitar it squeaks and feeds back like a bastard. It just about copes over 1.5m but is unreliable over a longer run. If I had any electronics knowledge at all there’d probably be an explanation.
So I will be using it live, as I hope it’ll reduce setup/breakdown times. Pics of the final setup to follow
Actually there won't be any pics; I've had a radical rethink and gone all old-school, and I've got rid of the Vox Valvetronix and Boss pedalboard, in favour of a good old-fashioned valve (tube for American listeners) amplifier. I've built up a nice selection - main gigging amp is a 15-watt Laney Cub 12R, perfectly loud enough for the small pub/club gigs we play, plus it now has a 1976 vintage Celestion speaker in it for lovely warm bluesiness. I always carry a spare, which is a cheap Harley Benton GA15, although my friend and amp builder has tweaked it slightly, and it also has a Celestion speaker inside. For bigger, posher venues I use my precious and brand new Trevinitone TT18 18-watt, hand built by my friend. If I really want it loud, I also have a 1981 vintage Watkins (WEM) Dominator Mark4, which runs about 30 watts but has enough power to demolish small dwellings.
I just use a simple Ernie Ball volume pedal to switch between rhythm and lead sections, but otherwise plugged straight in. It's a lot less bother!
That said, I was very happy with the Cat5 solution, and did use it for gigging for a good few months. Gets some funny looks from those 'in the know', I can tell you.
Monday 04 July 2011 at 5:24 pm
The stage end now looks like this:
In a metal box for protection from drunken dancing audience members with uprated jack sockets.
Inside view:
Next week - testing live!
Tuesday 28 June 2011 at 2:26 pm
Moved into phase 2, here’s what I have now:
Basically a Cat5 socket connected to 4 bits of guitar cable with jacks on the end, and;
and a Cat 5 socket connected directly to 4 jack sockets.
Item 1 gets connected to the amp sockets: input, FX send, FX return and footswitch
Item 2 (stage end) connected by short patches to input/output of the pedal, guitar connected to the corresponding input socket. For my test the amp I used had the wrong type of footswitch (momentary action rather than latching), so I had to plug the actual footswitch into the box. All I’m really doing here is making an extension cable, but just using the medium of Cat5 rather than multicore!
BUT… the damn thing works! No apparent crosstalk/interference/line hum/attenuation, even through a 5m patch cable. I’d call that a success. Next time, testing it in a proper band environment (rehearsal room)…
Thursday 23 June 2011 at 2:08 pm
My stage guitar rig can be a bit of a bind when setting up and breaking down – it’s configured thus:
Guitar plugs straight into amp
Effects send to Boss GT8 pedal
Output from GT8 to effects return
Additional cable from GT8 to footswitch allowing GT8 to switch channel
So all in all 4 cables involved. I wanted to try & cut down, initially by using a 4-pair multicore, then I could bring the guitar input down to the floor, keeping to a single cable run.
But multicore can be a bit expensive, and I’m an IT network technician with access to lots of Cat5 cable, so I started to wonder… Could I run the whole thing over Cat5 UTPnetwork cable, put a RJ45 socket at either end then all I’d need is a patch cable of the correct length.
No-one as far as I can see on several Googlings has tried it, so the only way to find out is to experiment.
Today I have this:
which is an old guitar lead soldered to one pair of a bit of Cat5, punched down onto a socket module
and this
which is Cat5 cable punched down into a module with a jack plug on the end
Plug in the lead to my guitar, plug the 2nd bit into an amp*, connect with a 5m patch lead and… bingo! It works! No apparent loss of signal strength or quality.
*I did use a proper amp to test – the mini-Marshall is just to show schematic!
Next step is to put in the other channels and see if there’s any crosstalk, hum or interference with the FX loop running backwards & forwards. Watch this space.
Friday 28 January 2011 at 8:38 pm
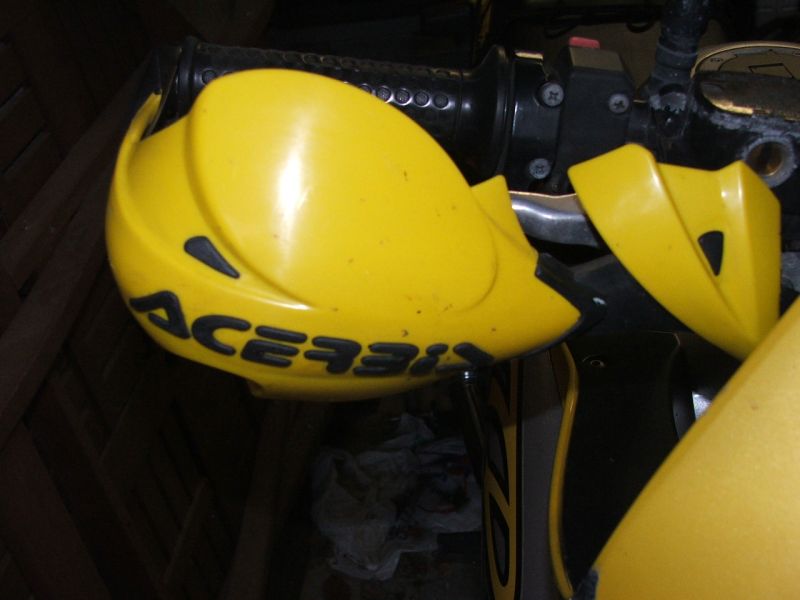
As requested by my friends at Carpe-TDM here's some more pics of my handguards.
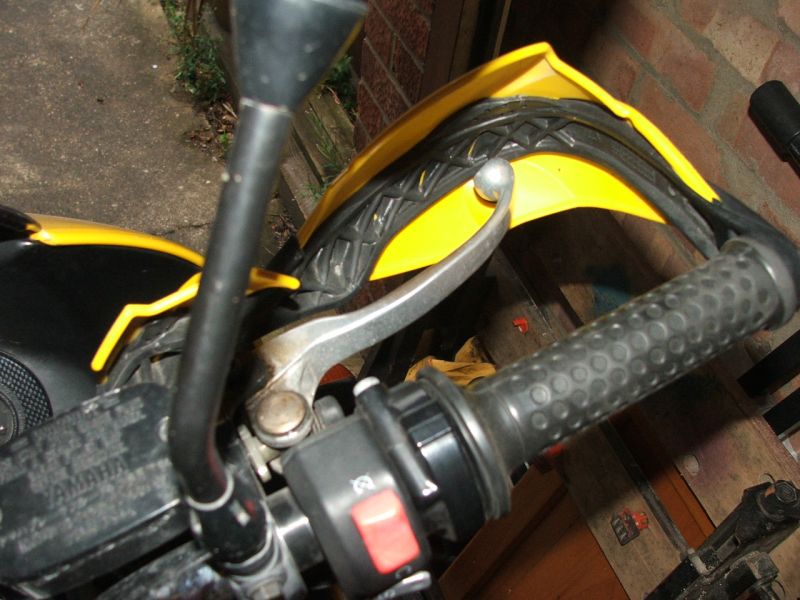
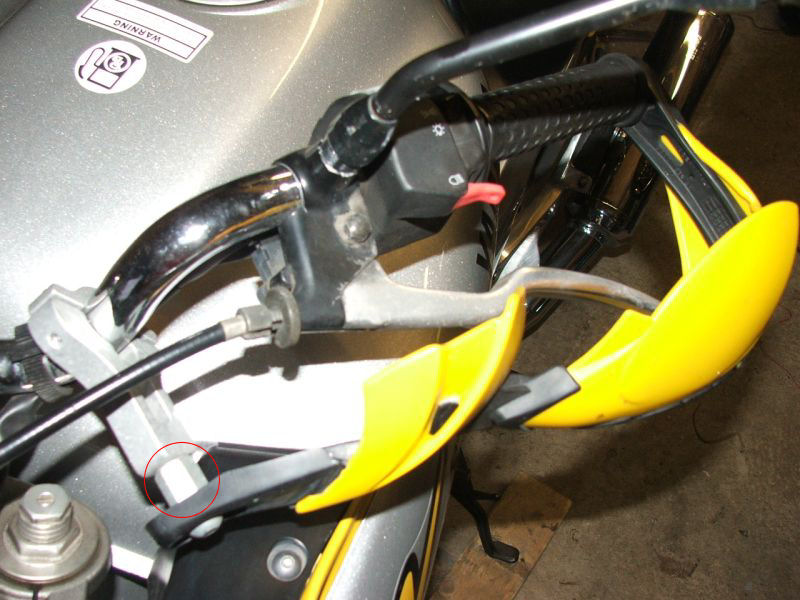
They're Acerbis Rally II's whose website is HERE. They were an easy fit, and have stayed put ever since I put them on, about 4 years ago. If you're leafing through the Acerbis catalogue, I also used the 'ATV fitting kit' which is no more than a stand-off for the inboard end. The bar end weights had to go, so the Acerbis expanding bolt fitment went straight on. Excuse the grubby state of the bike!
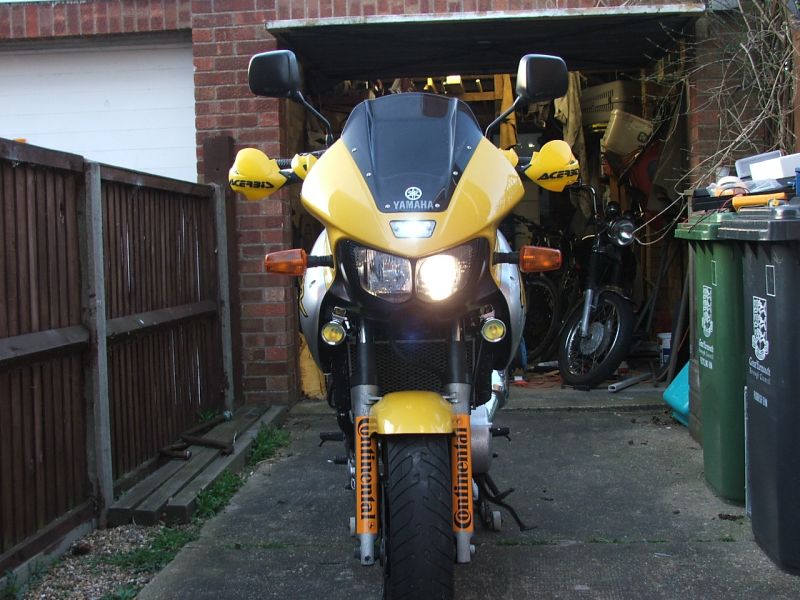
Front view
Top views - you can see the stand-off hex bolt thing above.
The end result